Training Module 05
Transfer Files Using SCP
Requirements
- Completed Module 03: Configure Raspberry Pi and Remote Connect Using SSH
- Completed Module 05: Build Isolated Driver as a Java Class
Objective
The purpose of this module is to use the Isolated Java Application we created in the last module to read and display data from the KY-032 Sensor that we previously connected to our Raspberry Pi. To do this, we wll utilize the Secure Copy Protocol. SCP relies on the SSH protocol that we set up in Module 03. Let's get started!
Build Application
In the previous module, we added the appliation pluggin to our build.gradle file. The pluggin allows you to run gradle installDist to create an image of the application in build-->install-->projectName.
Navigate to your project and select installDist under the gradle menu in IntelliJ:
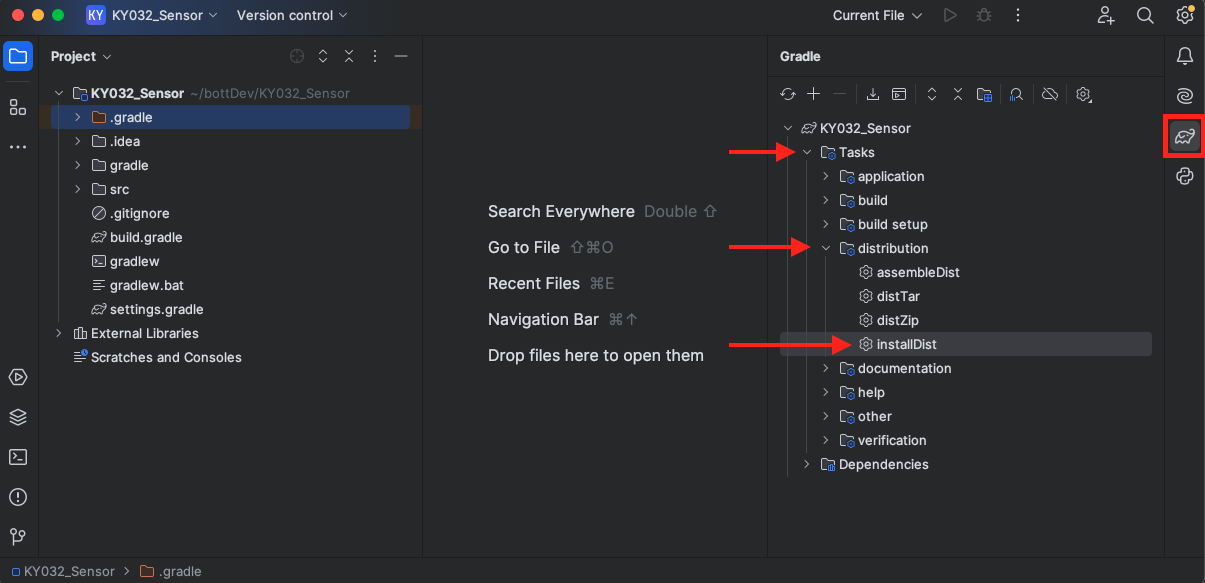
Once the build is complete, you'll notice a new build directory in your Explorer Tree. The files we need are all contained under the KY032_Sensor Directory:

Create End Point Location on Raspberry Pi
Open your terminal. Make sure that you're Raspberry Pi is connected to the network and use ping raspberrypi.local like in Module 03 to get IP Address of the RPi. Use that address to SSH into the Pi:
ssh pi@<ip address>
password: raspberry
Navigate to the RPi's Destop and make a directory called KY032 and use the pwd to display the current directory:
cd Desktop
mkdir KY032
cd KY032
pwd

>>> /home/pi/Desktop/KY032
Therefore, the full address for this destination is:
pi@192.168.50.122:/home/pi/Desktop/KY032
Transfer App to Raspberry Pi using SCP
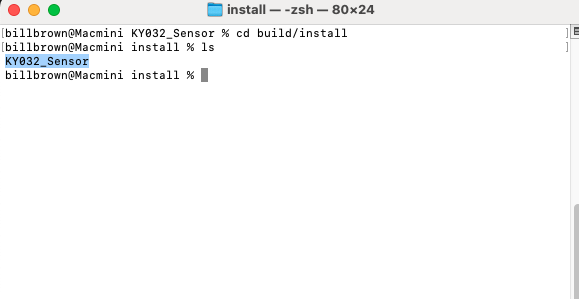
Open a new tab on your terminal and navigate to the build KY032_Sensor Directory of your IntelliJ Project:
Next, use the SCP protocol to transfer the KY032_Sensor build to the Raspberry Pi. The general format for SCP is:
scp <source> <destination>
- source is the file or directory to be copied.
- destination is the location of where the directory will be copied. The destination requires a username. The default username for a Raspberry Pi is Pi
In your terminal, write the following:
scp -r KY032_Sensor pi@192.168.50.122:/home/pi/Desktop/KY032
By using the -r tag, all files within the directory will be provided. Now, using the previous terminal that is remotely connected to the Raspberry Pi via SSH, you should be able to see your KY032_Sensor application file in the destination diretory. Navigate to this directory and type the following commands:
ls
>>> bin    lib

java -cp "lib/*" org.example.Main
The command java -cp "lib/*" org.example.Main uses the Java runtime command to include all classpath (-cp) files in the lib directory to run the main method in the org.example.Main.Class.
In your terminal, you should begin to see a Sensor Boolean Value of either true or false every time the state of sensor's signal changes. If a signal is detected in front of the sensor, the value will be true.
Conclusion
Congratulations! You officially configured a sensor to a Raspberry Pi, created a driver, and wrote an application to retrieve the sensor results. In the next modules, we will begin to use OpenSensorHub to to look at sensor data.